Wednesday, December 19, 2018

Shahi Tukda Recipe | Dessert


Shahi tukda; as the name suggests is a rich in flavour. I learnt this recipe from my mum. This dessert is mouth watering & tastes heavenly awesome specially in winters.

So let's begin with the recipe.

Ingredients:-

For rabadi:-
Milk - 1 ltr.
Sugar - 4 tbsp (optional as this recipe will also include sugar syrup)
Kesar - Few strands
(You can use food color, but i prefer kesar for rich flavour)
Pistachio & Almonds- Each 8-10(Roughly chopped)

For Sugar Syrup :-
Sugar- 2 cups
water- 3/4 glass
Caradomom Powder- 1/4 tsp

For Base :-
Ghee ( for frying)
Bread - 8-10 slice

Method :-

First of all we will make the rabadi, and for this take a heavy bottom pan. Add milk in it & put it on the flame.
Now keep stiring the milk untill it boils. Once the boil comes, reduce the flame, add kesar & dry fruits and let it cook till it thickens like rabadi (excess thick). Keep in mind, keep stiring occassionly otherwise it will burn.

We will add half of the dry fruits at this stage & will use remaining half for the garnishing.

Once the rabadi is ready, let it cool down completely.

Now we'll make the sugar syrup. For this in a pan add sugar and water. cook it till the sugar dilutes by stiring it continously. When the boil comes add caradmom powder to it.

The syrup should not be too thick. Thus, after few boils turn of the flame.

These two things need to be prepared in advance. Now comes the last step.

When you want to serve it, heat up the ghee in a kadai/pan. Cut the bread into triangles.

Deep fry the bread slices into hot ghee till it turns brown or as you may like.

Dip the fried slice into hot syrup for few seconds till it absorb the sugar syrup and then tranfer the slice into serving plate. Now spread good amount of rabadi over it and garnish with kesar strands & dry fruits. The dessert is ready to be served hot.😋

If you like the recipe or have any doubts, tell me in the comment section below.

Wednesday, November 21, 2018

Palak Paneer Restaurant Style

In Paneer dishes, there are ample of varieties in main course & one of them is Palak Paneer.
It is also known as 'Spinach Curry With Cottage Cheese'.

So let's begin with the mouth watering recipe😋

Preparation time:- 10 min
Serving :- 4
Cooking time:- 20 min
Cuisine:- North Indian

Ingredients:-
Palak :- 1 + 1/2 cup (chopped and washed)
Coriander :- Handful (chopped and washed)
Paneer :- 200 gm
Cream/Yoghurt- 2 tbsp
Oil :- 2 tbsp
butter :- 1 tbsp
Cumin Seeds :- 1/4 tsp
Ginger Garlic Paste :- 1 tsp
onion :- 1 big size(roughly chopped)
Tomato :- 1 big size (roughly chopped)
Green chilli (optional) - 1 (slit it)
Salt :- To taste
Red chilli powder - 1 + 1/4 tsp
Turmeric powder - 1/4 tsp
Coriander powder- 1 tsp
Wheat Flour ( secret ingredient of this recipe)- 1 +1/2 tsp
Garam Masala - 1 tsp
Water

Recipe :-
Firstly, we need to blanch spinach & coriander. For this we'll put up a pan on heat and add water in it. When the water comes to a boil then we'll add spinach, after 2-3 minutes we'll add coriander and will cook it for 1 more minute and then turn of the flame. Right after this strain the water from this and instantly pour cold water over the veggie so that it stop cooking further and the color of the spinach remains the same.

Now in the other pan add 1 tbsp oil and cumin seeds, when oil heats up add Ginger garlic paste,chopped onion, tomato, chilli and salt. Cook this untill the tomato is messy and then cool it down completely.
Now, transfer this to a grinder along with spinach and coriander and grind it to a smooth paste.

Again in the same pain, add remaining 1 tbsp oil and 1 tbsp butter. Add dry spices to it like, turmeric, chilli powder, whear flour, Coriander powder. Adding dry spices directly to the oil give good colour and aroma to the curry but don't over cook it otherwise the spices will start burning, cook only for few seconds and then add the puree we made to it. Now add either cream or curd and chopped paneer to it and let it simmer for few minutes but remember don't over cook otherwise the spinach will loose it's bright colour.

The sourness of curd will cut the bitterness of spinach.
At the end add garam masala to it and turn of the flame. You can garnish it with Cream. Serve hot.

P.S. You can adjust the spices as per your taste.

Wednesday, January 3, 2018

10 Amazing Toothpaste Hacks that will surely help you doing many things.

Toothpaste is not just for our teeth, it has many other uses as well. Yes, you read it right. so let's check the "Toothpaste Hacks".

1. Silver jewellery:-

With the help of toothpaste we can clean our old and dirty silver jewellery. Don't surprise !

Method:-

Wash the jewellery piece in lukewarm water then apply any toothpaste (preferably white toothpaste) and rub this with the help of a soft brush. Keep rubbing untill you see whole the dirt come out. Now wash the silver piece in cold water and you'll see the new shining piece of jewellery.

P.S. - It will not damage the jewellery.

2. Furniture:-

Kids when growing up draws all the walls as well as furniture of the house and it's hard to remove the stains. But with toothpaste you can easily remove stains/marks of pen/pensils/colors from the furniture in just few minutes.

Again for this you need a toothpaste, apply this over the marks only, spray some water and then rub with brush or any scrubber and all the marks will disapper. After this spary again some water and wipe it with a clean cloth & you are sorted.

3. Walls:-

Same as furniture, you can remove all the crayons or other marks from wall as well.
See, so easssyy !!

4. Sneakers:-

Do you have sneakers which get dirty specially if it's white ?

Then this hack is for you my friend. Apply some white toothpaste on sneaker where it is dirty and rub it with a brush and then clean with a damp cloth & here you go.

5. Relive Burn:-

This hack is for you ladies. We sometimes have very minore burns while doing kitchen chores, for that you can apply the toothpaste to the effective area.

Use toothpaste to relieve those burns. It provides a cooling sensation that works wonders for taking the burn away, but remember that this should only be done for very minor burns. Never treat a bad burn with anything before consulting a doctor.

6. Scratches On Furniture & Floors:-

Put some toothpaste over the scratches and rub it in with a cloth. This will remove the scratch. Keep in mind that this won’t work for major scratches, but for any minor.

7. Mobile Screen:-

Rub the bit of toothpaste on the screen of your phone and use a cloth to remove the toothpaste. The toothpaste will remove the scratches and leave your phone looking brand new! Just be sure not to get your phone wet, and make sure you clean off all the toothpaste.

8. Repair scratched CD/DVD:-

Toothpaste can be used to safely and effectively remove scratches from CD and DVD. You just have to rub a bit of toothpaste on the CD with a soft cloth and then remove with a clean cloth. Make sure you rub it over all the scratches. 

9. Rusty/dusty Stains:-

You can use toothpaste to get rid of those rusty and dirty stains, just use a cloth with toothpaste or if you are cleaning house appliance, you can use a toothbrush to scrub away rusty and dirty stains.

10. Sunglasses:-

Like any other scratch mentioned above you can remove scratch from your sunglasses also in the same way mentioned above.

Tuesday, September 19, 2017

Dandruff & winters :- Get rid of dandruff in winters.

Hello Friends,
Hope you all are doing good.

As we all know winters are at the doorstep.
We love this season for many reasons but it brings lot of skin and hair problem with itself.
But if we start protecting for these before the winters come then it will not annoy us afterwards.
Protection is always better than cure.

Today let's talk about the thing which comes in our mind first i.e. dandruff.

What is dandruff ?

Dandruff is the shedding of dead skin cells from the scalp.Dandruff is a common scalp disorder affecting almost half of the population at the post-pubertal age and of any sex and race. It often causes itching.

How to treat with this ?

We go to doctors or salons to get rid of dandruff/itchy scalp, but we can get rid of this by sitting at our home only by apply natural ingredients or the material available at home easily.
So let's begin with it :-

1. Lemon

Yes, just one ingredient.
After washing your hair (afte shampoo and conditioner) just pour lemon juice on the scalp in leave it. Don't wash it again.
Air dry your hair and you are sorted.
You will feel the difference with just once application.
Note :- amount of lemon juice depends upon the effected area.

2. Yogurt/curd

Now this inredient is a boon to hair.
It contains lactic acid which cleanses the scalp with it's anti-fungal and anti-bacterial properties. It also gives nourishment to hair which strengthens the hair and make them shiny.
Apply this on your hair (both scalp and ends). Leave it for about 30 minutes and then wash it with lukewarm water then apply the shampoo.

3. Yogurt & fenugreek seeds

As i said yogurt is a boon to hair so there are ample of packs that can be made from yogurt for better results.
Make powder from fenugreek seeds then soak it overnight in yogurt and apply this mask in the morning and leave it for about 45 minutes and then rinse it off.
Note :- shampoo after this to get rid of smell of the mask.

4. Curd- banana
Ingredients :
Curd 1 cup
Banana 1 ( mashed)
Egg (optional)
Oilve oil - 1tsp
Honey - 1tsp

Mix all the ingredients well and apply it properly on your scalp and the hair till the edges. Leave it for 45 minutes and wash it off with lukewarm water.

Note :- you can use normal or cold water also.

5. Neem

This one is also very simple.
Just boil the leaves of neem in water and allow it to cool down and pour this in a spray bottle and spray on the scalp before 30 minutes your shampoo your hair.
If you don't have spray bottle then just make a paste of it and then apply it as a mask.
The anti-microbial and blood purifying properties of neem leaves address the root causes of the hair loss & dandruff.

6. DIY Oil

Ingredients :
Coconut oil - 500 ml
Neem leaves - handful
Fenugreek powder - 1/4th cup

Mix the all the ingredients well and boil for 5-7 minutes on a medium to high flame.
Allow it to cool down and then strain it with the help of strainer and store this oil in a glass jar/bottle or any other bottle.
Massage with this oil in to the scalp gently and leave it overnight or if you are in hurry then too for at least one hour. If you use lukewarm oil then it will be best.

This oil do wonder on your hair if you have fungal infection, hair loss, dandruff, itchiness etc.

There are lots of packs and masks DIY oils for the hair. I can't include everything in this single post.
Hope you liked it.
Thanks for reading.
Have a good day ahead.

~Parul~

Sunday, August 13, 2017

Water Intake :- something which will change your life.

Every woman is beautiful in her own way.
So first cheers to all ladies here.
We all want a glowing (not fair) skin, as far as i surveyed about it, this can't be achieved overnight.

Why ?????

Here is the reason :-

Glow is something which comes from inside. You may go to any best salon to get that glow and after treatment with many products you might get the glow but that will not last longer.
If we want a long lasting glow we need to check our intake and if we talk about intake; first comes water intake.
Yes, water.
Now you will think how this will effect our skin ?
Water is something which helps you in getting that glow by hydrating your body & remove all the toxins from your body.
Many studies have prooved that water intake should be proper to stay healthy and glowing.

What is your beauty secret ?
The answer of models & celebrities is almost always :- drinking water !
Sound like a banel standard statement. But it is true.

Without proper hydration your skin will become dull & dry. You can understand it with a very nearby example :- without or with lesser amount of  water how a plat will become ?
Euuuu...
Yes, that's what exactly with our skin.
So here is the formula.

Stay hydrated all day long !

The importance of water can not be explained thoroughly with this one post.
Altough i am also a kind of person whose water intake is very low. But few days ago i met a woman, in a salon and after meeting her my mind was completely changed. That day i realised what i was doing with my skin and body due to my this habbit. And right after meeting her i increased my water intake during a day and i saw the difference even in this very short period.
Thanks to her.

Note:- Hydration means proper hydration i.e. to drink at least minimum glasses of water required by your body ( as per your age, gender, height, weight).

If this post helped you in any way, please share this to your loved ones 😊😊.

Stay hydrated.
Stay healthy & beautiful.

Wednesday, August 2, 2017

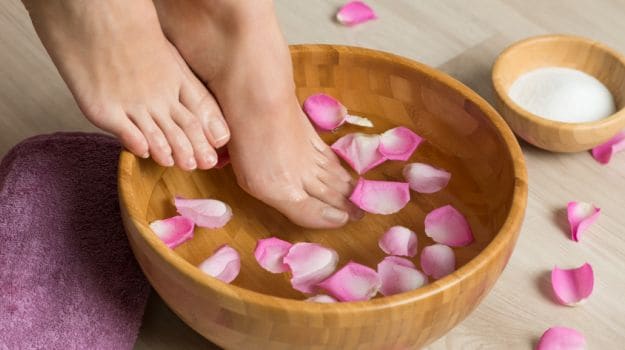
DIY Pedicure (with natural ingredients)

Today let's pamper your feet....

How about doing pedicure at home with natural ingredients that will give your feet relaxation and extra care and it,s safe as we are not using any chemical...

There is nothing quite as heavenly as a good pedicure. You can do it at home but it really is never the same. However, if you still want a DIY routine, put together the following list of items -pumice stone, nail brush, loofah, file, nail cleaner, cuticle pusher, a heavy duty moisturising cream, nail cutter, acetone, herbal shampoo, lemon slices, a tub of hot water, marigold flowers, honey and towels.

Step-by-step guide:


1. Clean your nails with acetone and cut and file them according to the required length and shape.
2. Massage a little cream or honey on the nails and dip into a tub of hot soapy water to which you have added some fresh lemon slices and marigold petals (believe me it makes all the difference and you’ll feel like a queen!).
3. Once the nails and skins have softened, clean the nails with the help of the brush, and use a pumice stone to dislodge dead skin on the heels. Pat dry and clean the nails with a cleaner and cuticle pusher.
4. Rub the lemon slices on the skin to remove tan and use a towel to pat dry.
5. Use the loofah to smooth out dead skin and mix 2 tsp each of honey and cream and massage well into the skin. Wipe off with hot towels and you are done!

2. Remedy for Tired Feet


If you have tired and aching feet and suffer from varicose veins, then the following foot remedy will help -

1. Take 2 litres boiled water and add in 2 cups pine needles (leaves), 2 cups rose petals and 2 tsp peppermint oil
.
2. Massage the feet with castor oil and then soak them in this soothing brew for about 10 minutes.
3. Add marbles or small pebbles in the tub and roll your heels on them to relax tired aching feet.
4. Dry briskly with a towel and rub in a good lemon massage cream.


Pedicure-at-home-DIY-remedies-1

3. Cracked Heels


one just has to be regular with a foot care program by using a loofah and keeping the feet well moisturised and clean at all times.

However, here’s a really easy remedy –

1. Clean the feet well with a pumice stone and nail brush and pat dry.
2. Massage the feet well with a heavy duty cream or sesame and sandalwood oil until the skin has absorbed most of it.
3. Melt a candle in a double boiler and when slightly cool, brush it on the heels and allow it to solidify.

This remedy is best followed at night. Put on cotton socks and go to bed. In the morning, remove the socks and peel off the layer of wax. Follow it daily for a week and you will find a huge difference in the way your feet look and feel.

4. Chipped Nails


For those of you suffering from chipped nails, mix 1 tsp of gelatine with half a glass of water and drink it daily for two weeks. Besides this, keep the nails short and well-trimmed to strengthen the base. Long toe nails not only look awful, but can be quite painful in closed shoes.

Let your nails breathe and if at all they have turned yellow due to regular use of nail colour, please let them breathe. A quick tip: rub lemon slices on the toe nails daily and allow the juice to soak in. You will find them coming back to their natural healthy colour in no time.

Now that you have some wonderful foot pampering tips in your beauty book, start right away!

Cleaning Tips for your home in monsoon

Rainy season has knocked the door💦💦💦💦

Monsoon is here and raindrops have been pouring in your city for quite some time now. During the season of sudden downpours not only do you need to carry an umbrella at all times but you also need to take good care of your health. Wait, did you forget something? How about protecting your homes? Check out some interesting tips to keep your homes dry and safe when it’s raining cats and dogs outside.


We’ve compiled a few generic hygiene practices that every home must consider during the monsoon season – following these and ensuring the utmost levels of cleanliness all over the house will ensure that you and your loved ones have a healthy, happy monsoon.
  1. Wash your hands and feet after coming home. You pick up several germs and quite some dirt on your clothes and skin during the monsoon. The best hygienic practice to follow during the season is to shower in warm water when you return home. If you do not have the time for a shower, wash your hands and feet thoroughly with warm water infused with antiseptic liquid – try the Dettol antiseptic liquid in your bath for the best results. A fast acting disinfecting Dettol hand wash is a must for the wash basin. When outdoors, keep a hand sanitizer in your bag and use it before and after meals or after touching shared surfaces.
  2. Wash your clothes regularly. You might not sweat much in this season, but your clothes will become damp many times over when it rains. Excess moisture invites a lot of bacterial germs and fungi – these make your clothes smell bad and also cause skin infections. Washing your clothes after every use is best – use an antibacterial detergent and keep silica packets in your wardrobe to keep your clothes dry and minus the musty odour.
  3. Clean your footwear every few days. Your footwear is a hotbed of germs, dirt and dried muddy water. It can cause fungal infections, rashes, boils and even infect already broken skin. Do not wait for your footwear to smell bad before you wash it – give it a good scrub every two days to remove trapped dirt, mould and other impurities. Also follow a practice of applying anti-bacterial powder on your feet and wearing socks inside your shoes.
  4. Keep the kitchen and bathroom clean. The wet areas of the house are more predisposed to germs and bacteria than other areas. There is no option but to keep these areas as dry as possible and to give them a good scrub and wipe down at least twice a week. Use a strong tile and floor soap in your cleaning water, wipe down the cooking tops, stove, faucets, toilet seat, switches, towel rods and door knobs with Dettol Multi-Use antibacterial wipes. Also, disinfect the toilet bowl once a week to keep illness-causing germs away.
  5. Get a pest control treatment done. A lot of pests will make your way into your home this season as they flee the wet outdoors. The general damp atmosphere also gives rise to aerial bacteria that settles on every surface. It is best to get a pest control service done for the house during the monsoon. Fumigating the house gets rid of mosquitoes and flies, while sprays and gels remove cockroaches, ants and spiders. Also get any cavities in the walls or pipes sealed so that rats and lizards do not enter the home.

Tea Talk :- How to choose career for you; the right way

Like many people, you may be wondering how to choose the right career. The most important thing you can do when you are trying to pick a career is to choose one that is right for you. Finding out what career is a good fit for you is truly all that matters. Ignore people who tell you what type of work to pursue and best careers lists hyped in the media unless you do your homework.
Because you will pour so much of yourself into your job, and spend so much time at work, your career must be suitable for you.
It has to fit well with your interestsaptitudes, work-related values, and personality type. It has to have job duties that you can see yourself performing day in and day out, you must be willing to do everything you must to prepare for it, and it needs to have a good outlook for years to come.  If a career fits these criteria, there is a better chance you will be satisfied with it and enjoy your work. And you won't resent spending so much of your waking hours doing it.

First, Learn More About Yourself

Your first order of business is to learn as much as you can about yourself. If you think you know all there is to know, you will definitely be surprised by what you will discover by doing a thorough self assessment. While you can find online resources to help you with this, the most efficient and effective way to do it—although often not the cheapest—is to hire a career development professional, for example, a career counselor or career development facilitator.
He or she will use various tools to help you gather information about yourself and, based on it, provide you with a list of careers that might be a good fit.
If finances are an issue, don't let that keep you from getting the help you need. Many public libraries, for example, offer career planning services.
Ask the librarian at your local library. If yours doesn't provide this service, you may be able to get help from one in another community. The librarian can also direct you to local agencies that provide career counseling.
If you attended college, you should also check with that institution. Many career services offices provide help to alumni. Some local college or university career offices may be open to members of the community. Programs that train career counselors often have students work with clients at no or a low cost to gain experience.

Next, Learn About the Occupations on Your List

While the self assessment is a great starting point to begin your quest to choose the right career, it is not your final step in this process. Your list will contain seemingly suitable options. Some may be nearly perfect for you, but others may be all wrong. They may be a good match for your personality type, interests, values, and aptitudes, but may be unsuitable in other ways. For example, the job duties may be unappealing; the outlook may be poor; or you may not be willing to get the required education or training. But you won't know any of that without moving ahead to the next step.  Learning about the careers on your list is the only way to make an informed decision.
Before you do anything else, read descriptions of the occupations and learn about the job duties for each one. Try to ignore your preconceived notions. You may think you know something about a particular career, but unless you have personal experience with it or did prior research, you probably don't have enough information to decide whether you would be satisfied with the day-to-day work involved in it.
If after getting a job description and learning about its job duties, you are still interested in an occupation, you must learn what you will have to do to prepare to work in it. Unless you are willing to fulfill the educational and training requirements, you should not keep it on your list. If a career, for example, requires a great deal of education before you can begin working, but you have neither the desire nor the resources to commit to that, it's not a good choice for you.
Likewise, neither is a career that requires little training when you have the inclination and ability to earn a college degree.
Finally, you will be doing yourself a great disservice if you don't look at an occupation's outlook. The United States Bureau of Labor Statistics (B.L.S.) makes predictions about employment statistics over the next decade. Investing time training for a career only to find out there are limited opportunities when you are ready to enter your field of choice can be a waste of your time, effort, and money. 
When you have narrowed down your choices to just a few, then you should investigate even further, perhaps conducting some informational interviews with those working in the field. You can now make an educated decision. Now that's how to choose the right career.

Diet plan during pregnancy (a would be mother need extra care)

Right nutrition is important during pregnancy because your baby’s growth and development is dependent on your diet. The term “eat for two” is not true during pregnancy. Eating during pregnancy doesn’t mean over indulgence, but it means that you consume a wholesome, balanced diet to meet the increased nutritional requirement.
A compromised diet during pregnancy can lead to inappropriate weight gain, multiple nutrient deficiencies and pregnancy complications in mothers, while babies could be born with low birth weight and congenital malformations.
Results from NutriPlanet India, a study conducted in 2013, revealed deficiency of Iron, Folate, B12, Vitamin D and Vitamin A among pregnant women. Around 50-90 percent of pregnant women in India have iron deficiency – anemia. Low birth weight baby and maternal deaths are major consequences of anemia*.
It is important for you to consume a healthy balanced diet and take nutritional supplements as prescribed by your doctor.
Note: This reference food guide pyramid is for healthy pregnant women as provided by NIN. Kindly talk to your doctor about your nutrition requirements.

Foods and drink to avoid during pregnancy:
Proper diet during pregnancy is all about eating the right food. Some food may make you ill, so food safety needs to be a priority. Raw, undercooked foods carry pathogens / germs which lead to food borne illness. Now that you’re pregnant, you should leave the following foods out of your diet:

A step-by-step plan to clean kitchen...

1. Clear the counters of anything that doesn’t belong: straggling mail, cookbooks, permission slips awaiting signatures.

2. Fill the sink with hot water and a few squirts of dish soap. Drop in items that need soaking, like the crisper drawer, the dish rack, and the microwave turntable.

3. Empty the refrigerator, tossing anything that has expired. Throw dirty food-storage containers into the sink to soak. Working from top to bottom, wipe down the shelves with a paper towel or a rag spritzed with a nontoxic all-purpose cleaner.

4. Dust the high zones, knocking dirt and debris to the floor, where they will be swept up later. Using a telescoping duster, start right above the sink and work your way around the room, cleaning upper corners, light fixtures, and tops of cabinets. Don’t forget the top of the refrigerator. When you’re back at the sink, you’re ready to move on.

5. Clean the upper cabinets and anything else on the walls, including a mounted microwave. Spray the microwave interior with all-purpose cleaner and let sit for two minutes. With a damp, soapy cloth, wipe down the exterior. (If it’s stainless steel, use a cloth moistened with diluted white vinegar, instead of soapy water, to clean any fingerprints.) Next, wipe the doors and the pulls of the upper cabinets and anything else (frames, hooks, vent grates) you encounter as you circle the room. With a fresh damp, soapy cloth, wipe down the backsplash if you have one.
6. Back to the microwave. Your two minutes are up. Wipe the solution from the inside using a dry cloth. It’s OK if crumbs fall to the stove or the floor.

7. Spray the stovetop with all-purpose cleaner and let sit for a few minutes. For stubborn stains, add a powdered scrub that won’t scratch. We like Bar Keepers Friend.

8. Load the dishwasher with the items soaking in the sink, or hand wash them. Don’t drain the sink just yet.

9. Wipe the stovetop with a clean, dry cloth and, again, just let crumbs fall to the floor. It’s more efficient to get them at the end. When you’re finished, swap out the cloth to keep grease from transferring to another surface.

10. Clean the coffeemaker, toaster, stand mixer, and other small appliances from top to bottom, using glass cleaner or a multisurface formula (spray the cloth rather than the appliance) or a cleaning wipe. Dip drip trays or crumb catchers in the sink’s leftover warm, soapy water, then rinse and dry.

11. Scrub the countertops with small, circular motions, using a cleaner formulated for your surface.
12. Get the fridge doors, the front of the dishwasher, and the oven with a cloth dipped in clean, sudsy water (or diluted white vinegar if a door is stainless steel). Pay attention to the handles and the edges. Use a soft toothbrush or a cloth-wrapped spatula to degrime tight spots, like the folds of the refrigerator seal. Next, clean the sides of the dishwasher door with an all-purpose formula or a cloth dipped in a solution of hot, soapy water and white vinegar. (You can use this mixture to clean the stovetop and the countertops, unless they are marble, granite, or some other porous stone.)

13. Clean the lower cabinets and drawers with a damp, soapy cloth.

14. Drain the sink and rinse with hot water. Buff the basin with a mild abrasive cleanser and a microfiber cloth; rinse with hot water. Wipe down the faucet and the handles.

15. Empty the trash, swiping the inside of the can and the interior of the top with a cleaning wipe before replacing the bag.

16. Sweep the floor with an electro-static dry duster, like a Swiffer Sweeper. Get right up to the baseboards and under the cabinets, where crumbs can hide. Pull out appliances to reach the spaces near the walls. Follow with a mop (or a steam cleaner, if you have one), starting at the corner farthest from the room’s entrance, and use a bucket. (Dipping a mop in the sink could contaminate items that ultimately end up in your mouth.) Dump the dirty water outside or down the toilet.

17. Park yourself on the sofa. You’re done!

Importance of sunscreen in skin care routine.


Come summer and we all rush to the nearest cosmetic or medical store to grab that bottle of sunscreen lotion, don’t we? However, applying sunscreen should never be restricted to summer alone. Summer or winter, monsoon or spring, the need for shielding your skin from the harsh rays of the sun is essential. And, sunscreen does that job for you.

Why You Should Wear Sunscreen?

Let us have a look at the top 11 interesting reasons on why you should wear sunscreen throughout the year:

1. Shields From Harmful UV Rays:

The continuously depleting ozone layer has put us at a higher risk of getting affected from the harmful rays of the sun. While you do need the sun for your daily dose of Vitamin D, it does not imply that you should put your health at risk! Applying sunscreen actually blocks these harmful rays from penetrating the skin and triggering skin disorders.

2. Prevents Premature Aging:

All of us love to have younger looking, radiant, and healthy skin. And, this is one of the most convincing reasons to start using sunscreen. It shields your skin from developing signs of aging, such as wrinkles and fine lines. Studies reveal that people below the age of 55 who used sunscreen had 24% lesser chances of developing these aging signs than non-sunscreen and occasional sunscreen users.

3. Lowers Skin Cancer Risks:

While I started using sunscreen mainly for beauty reasons, this health benefit came as an advantage. Wear your sunscreen daily and over the days and months to shield your skin from the risk of various types of skin cancer, especially, melanoma. This is the worst type of skin cancers, which can be life threatening for women, particularly those who are in their 20s.

4. Lowers Blotchiness on Face:

Apply sunscreen liberally on your face to prevent the onset of that irritating blotchiness and eruptions of red veins. This is also essential to prevent the onset of acne and other sun rays- induced damages.

5. Prevents Sunburns:

Sunburns weaken your skin, subjecting it more to bruises. Your skin may suffer repeated attacks of peeling, swelling, redness, hives, and itching. And, this comes from the influence of UVB rays. The blisters can escalate the risk of skin cancer. A study published in ‘Annals of Epidemiology’ in August 2008 suggested that recurring occurrences of sunburns could actually put you at a higher risk of lethal melanoma. So, apply sunscreen and stay safe.

6. Prevents Tanning:

Tan is healthy – this concept still persists. However, what you should be aware is that while you are sunbathing to tan, you are at the risk of being harmed by the harsh ultraviolet B rays. Choose a sunscreen that has a minimum of sun protection factor 30 to prevent tanning induced by UVB. And, make sure you reapply sunscreen every two hours, especially if you have a sensitive skin. Or, just after your exercise, as sweat could wash away the protective coating.

7. Enhances Health of the Skin:

The essential skin proteins, such as collagen, keratin, and elastin are protected by sunscreen. These proteins are required for keeping the skin smooth and healthy. Make sure your sun block has titanium oxide in it for endowing these benefits to the skin.

8. A Good Cosmetic Option:

Now-a- days, you get sunscreens that also doubles up as a cream. Just apply it and leave on. I use a Lakme 9 to 5 sunscreen and nothing else when I go out in the sun. I look fresh and my skin rocks.
If you have a dry skin or sensitive skin, make sure you reapply a coating every now and then for better safety of your skin.

9. A Wide Assortment to Choose From at Inexpensive Rates:

There are countless variants of sunscreens available in the market today. Plus, they come at an affordable rate. There are countless sunscreen recipes online that you could prepare at home too, making them even more cost effective.

10. You May Not Have to Reapply After a Swim:

Most of the sunscreens or sun blocks available these days are waterproof. This enables you to enjoy yourself in the water, without burning yourself

11. Sunscreen Offers Better Protection Than a Full Sleeve Dress:

You cannot safeguard yourself from the sun by wearing a full-sleeve dress! Do you know that a cotton dress, particularly when damp, offers zero protection from the harmful rays of the sun? Just apply a generous amount of sunscreen under the dress as well.

How to Use Sunscreen?

How to use sunscreen everyday? There are a few factors that you need to keep in mind while picking up the sunscreen and using it everyday:
1. Always read the ingredient list and make sure your sunscreen contain the following:
  • Titanium dioxide
  • Octyl methoxycinnimate (OMC)
  • Avobenzone (also parsol)
  • Zinc oxide
2. Opt for a broad spectrum sunscreen lotion or gel that is non-comedogenic and hypoallergenic. Such sun creams will shield you from ultraviolet rays, both A and B, while safeguarding you from rashes, clogged pores, acne, and sun burns.
3. Choose a sunscreen that is waterproof and comes with a minimum SPF of 30.
4. Always apply sunscreen half an hour before you come into contact with the sun.

How Often to Use Sunscreens?

Sunscreens act as a shield against the harmful UV rays which penetrates every time your skin is exposed to the sun. It is therefore advisable to use sunscreen everyday. You may not notice the benefits now, but the advantage of using sunscreen is felt in the long run. If you are out in the sun for a long time either working or enjoying a sunbath in the beach, it is better to reapply sunscreen after every two hours to protect your skin from sunburns.
There is no specific time to start using sunscreen. It is always better to be late than never. Enjoy the sun 365 days with a liberal dab of sunscreen.
Do you use sunscreen? Or what is the reason behind you not using sunscreen? If you are using, what prompted you to use sunscreen? Share with us in the comments section below.

Shahi Tukda Recipe | Dessert

Shahi tukda; as the name suggests is a rich in flavour. I learnt this recipe from my mum . This dessert is mouth watering & tastes heav...